
We Are The CFO For Your Small Business
QuickBooks Tip 3 - Creating Invoices
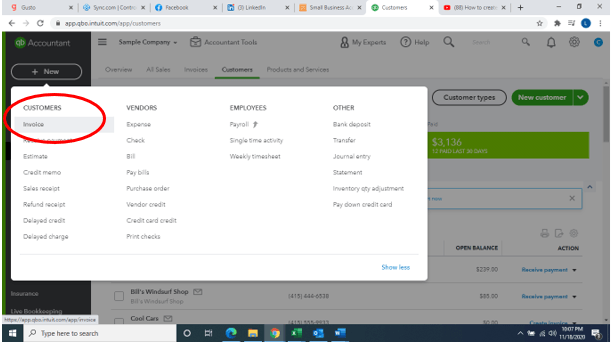
Welcome back to our weekly series on helpful QuickBooks (QBO) tips. Today, we will look at how to create invoices for those customers we added the last two weeks. There are several ways to create an invoice but the simplest is to click, “New” in the top left of screen. This toolbar is always there no matter the page you are looking at in QBO. Under the Customers menu, you will see “Invoice.” We have circled it in red below.
This will load the invoice screen. Your customers are located in the drop-down list and you can even create a new customer from there as well. If you filled in the customer fields previously, it will populate automatically here. The key aspects of the invoice you will need to add is the invoice date, due date, and terms, as well as the product, description, quantity, and rate of payment.

You can add a message on the invoice (partially shown in the bottom left of the picture) if you wish. To finish the invoice, click the green in the bottom right of the screen. You can choose from several options:
Save and New
Create a new invoice after this one
Save and Close
Move on to another task.
Save and send
If you have provided a customer email in the invoice, send it directly to them in QBO! You can even choose to accept payment online.
With QBO, invoices are easy to create and makes tracking outstanding receivables simple.
Want more tips on using QBO for your small business? Subscribe to our mailing list or follow us on Facebook, Instagram and Twitter!